Are you in love with the idea of styling your hands with the oh-so-amazing acrylic nails? Well, these certainly add spice to your entire look but getting them is not that easy. What not everyone knows is that getting acrylic nails done from a good salon can cost you A LOT.

In addition, by a lot, we don’t mean $1 or $2. Remember, the more professional the artist is and promising his/her work is, the more they will charge for their hard work. Hence, this is why many girls give up on the dream of enjoying fake extensions.
However, what if you could do your own acrylic nails at home? Is it possible? With the right nail supplies and nail accessories, nothing is impossible! If you wish to give it shot, here is how you can do it:
- Things You’ll Need
Before you rush into doing your fake extensions, make sure you have the complete nail supplies and nail accessories, or else, you will fail miserably at it. Here is what you need to create your own set of fake nails:
- Nail filer and buffer (could be a manual one or electric)
- Nail dehydrator
- Nail primer
- Cuticle pusher
- Dipping dish
- Acrylic powder
- Good quality lint-free wipes
- Acrylic liquid
- Acetone
- Topcoat
- Nail colors of your choice
- Nail accessories like beads, glitter, etc
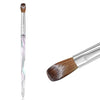
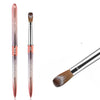
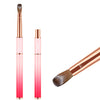
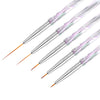
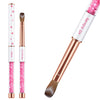
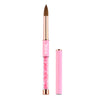
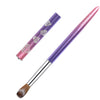
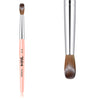
- Acrylic nail brush
- Cuticle oil

Once you have collected all the things, next move on to creating your fake extension. Excited, right?
- Prep the Nails
Before you create the fake nails, it is important to prep the nails first as your prep your hairs before styling for best results. Gently push the cuticle behind, cut the access growth, clean dust from inside and outside of the nails, using a block buffer or an electric one, get rid of the shine, and smooth out the edges.
- Create Acrylic Nails
Since you have prepped your nails, next comes the most crucial part of creating your own acrylic nails. Pour the acrylic liquid into the dipping dish. Next, pick the acrylic nailbrush and push it against the bottom of the dish to dampen it and get rid of the bubbles.
Swipe the brush to get rid of the excess liquid and then dip the tip in acrylic powder to get a generous amount of it. Now, gently apply the acrylic powder at the tip of the nail and stroke it outside to extend it in length, hence giving it the shape of a nail.
Make sure there are no bubbles and you work your way smoothly to get evenly created fake nails. Repeat the same process to cover the entire nail and get the desired results.
Once done, let it dry completely before you trim it into your favorite nail shape and smooth out the edges.
- Decorate as You Like
Since you have successfully done your own fake nails, you can either decorate them or simply paint them with your favorite nail color. When you finish, add a generous amount of topcoat for shine and keep the nails protected against chipping or creaking.
- Hydrate the Cuticles
In the end, do not forget to apply oil on the cuticles to keep them hydrated so that your natural nails do not suffer from the use of chemicals and hefty decorative.
With these simple steps, we bet you will not have to go to the salon next time you need to get your acrylic nails done


